Business Tips
Mehub Memberships quick start guide
Alex Dinh
Oct 16, 2025
Design a membership that fits your goals — whether that’s a simple “merch club” with exclusive discounts and products, or a creative hub where fans get early access, private content, and special perks.

With Mehub Memberships, you can bring your homepage, shop, and members-only space together in one seamless, fully branded experience.
Design a membership that fits your goals — whether that’s a simple “merch club” with exclusive discounts and products, or a creative hub where fans get early access, private content, and special perks.
1. Enable Memberships
From your Dashboard, go to Memberships → Overview.
This section includes your setup checklist — a step-by-step guide to launch your membership successfully.

Use the left-hand menu to manage everything:
Overview: Guided setup and progress tracking
Members: View and engage with your member list
Posts: Create and schedule members-only updates
Video Series: Build and share exclusive video collections
Messages: Chat directly with your supporters
Perks & Tiers: Set up membership levels and rewards
Settings: Manage badges, welcome messages, and app access
You can also find other basic guides here:

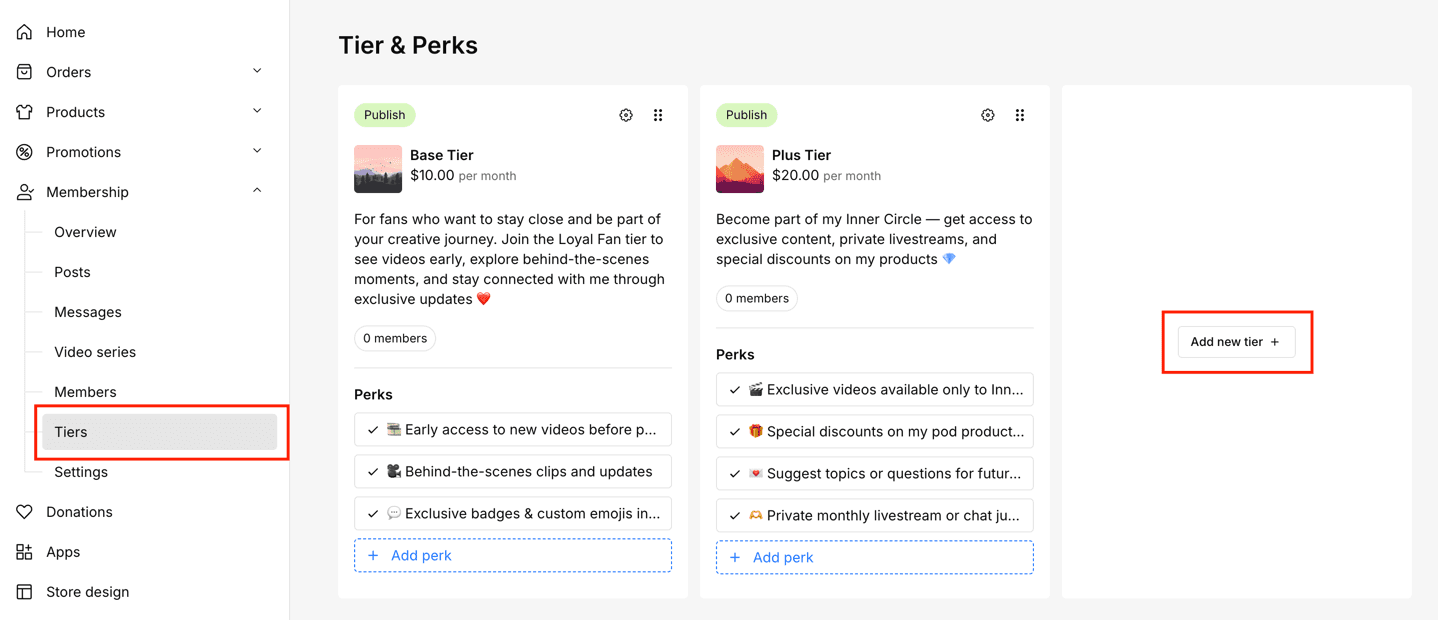
2. Create Membership Tiers
Tiers define the different levels your supporters can join.
You can offer one simple tier or multiple with varying perks. Choose what’s valuable to your fans and sustainable for you.
Examples:
Single-tier model: Exclusive discounts, products, or Discord access — minimal effort.
Multi-tier model: 2–3 levels offering a mix of content, events, and benefits.
You’ll need at least one tier to launch your Memberships.
Add or edit tiers under Memberships → Perks & tiers → Add new tier.
3. Add Perks
Perks are what make each tier special.

They can be:
Passive: Exclusive discounts or products that require no extra work
Active: Content, events, or Q&As that drive engagement
Interactive: Polls, AMAs, or community-driven rewards
Available perk types include:
Custom perk: Create a fully personalized reward
Discord: Give special roles or access in your Discord server
Members-only discounts: Offer exclusive promotions
Members-only products: Reward your most loyal fans
Private audio RSS feed: Share audio content in one private channel
To add a perk, click Add perk within a tier and follow the on-screen instructions.
4. Publish Your First Members-Only Post
Welcome your members with a special post! This could be a short note, teaser, or early-access drop.

Ideas:
A friendly “Welcome to Memberships!” message
Behind-the-scenes footage or previews
A poll to ask what kind of content they’d like next
A teaser or early-access version of upcoming work
Your first post doesn’t need to be fancy — it’s just a way to set the tone and make members feel part of something exciting.
5. Add Memberships to Your Homepage
Once you’ve created at least one tier and added perks, your membership will be available at:yourshopname.mehub.space/membership.
To make it visible to fans:
Add Membership Tiers to your homepage: In Store design → Select Add section → Choose Tiers.

Make it easy for fans to find in Header: Go to Store design → Select Header → Click Edit menu → Choose Add page or link → Attach your Membership link or select the Membership pages you want to show.

6. Launch Your Memberships
Everything’s ready — now it’s time to share it with the world!
Try these launch ideas:
Post a welcome message or exclusive content
Feature Memberships in your homepage banner or announcement bar
Offer early-bird perks or limited-time discounts
Check out our full guide on Launching Memberships 🚀 for more best practices.
🎉 You’re all set!
Your Mehub Memberships are live — start connecting with your community, rewarding loyal fans, and growing your brand.

Written by
Alex Dinh
Alex Dinh is a software engineer and tech blogger with over 8 years of experience. His blog offers coding tips, product reviews, and tech guides, while also supporting young developers in kickstarting their careers.

